STLs for adding Printy Panel ports into any models. Works within your slicing software!
Customization
Port Options
- Lofted Port- makes an easier to print port
- Flat Port - makes a more shallow port for cases where a lofted port won't fit
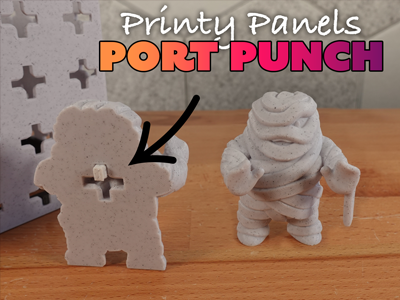
How To Use the Port Punch
These instructions are for Prusaslicer, but the basic process is the same on similar slicers.
- Add the model you want to customize into your slicing software.
- Right click on the model.
- Select “Add negative volume”.
- Select “Load…”.
- Select the STL for the port punch you want to use.
- Position the port as desired. Make sure the port sits on the surface of your build plate!
- Slice the model. Preview the results before sending it to your printer.
Port Pin
The port print is used as a connector between a Printy Panel and a print with a Printy Panel Port. One side of the port is slightly thicker to help it stay in the model. However, it's advised to glue the pin into your model to keep it from sliding out too easily.