Summary
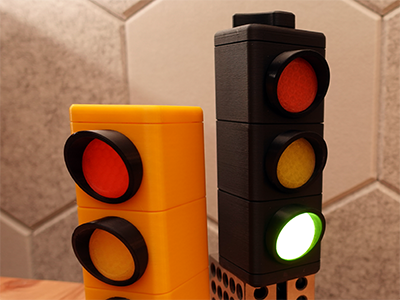
This traffic light toy changes state through a manually rotated shutter.
The design is intended to be used with translucent filament lenses and a single internal light source, but it could easily be adapted for multiple bulbs.
Printing
- All parts can be printed without supports.
- For best results, use a translucent filament when printing the lenses. Use a thinner lens if translucent filament is not available.
Customization
- Rotating Shutter
This option uses a rotating cylindrical shutter in the center of the model to let light pass through only one lens at a time. If you choose to build this version, print 3 copies of Shutter.stl, 1 copy of Shutter_Top.stl, and 1 copy of Knob.stl - Solid Shutter
Use this if you want a play-friendly non-electronic traffic light. Just skip adding the lenses and either paint or use vinyl stickers to give each layer of the solid shutter the desired light color. The solid shutter has indicator lines dividing the area to be colored. - No Shutter
This option drops the rotating shutter and leaves the center of the model completely open so that light will pass through all 3 lenses. - Sectioned
This option divides the center of the model into separate segments (Box_Segmented.stl) so that individual lights can be installed behind each lens. Use this option if you intend to control the street light electronically. - Hanging
Both Box.stl and Box_Segmented.stl files have a hanger variants. Use these if you want to hang the light on a wall.
Assembly
- Assembly will depend on what version you intend to build. Watch the video above for the complete assembly of the "Rotating Shutter" version of this model.
- Several parts for this project have bolt holes that intentionally have an internal .2mm support layer that must be punctured before the bolt will fit.
- If adding magnets (helps snap the rotating shutter into position), use cylinder magnets that are 6mm in diameter and 3mm tall.
- Parts that cannot be bolted into place (Lens.stl, Lens_Frame.stl) should be secured with hot glue or super glue.
- Use M3 socket head bolts that are at least 8mm long to construct the central shutter column.
- Use M3 socket head bolts that are at least 12mm long to attach the shutter top to the rest of the central shutter column.
- Use M3 socket head bolts that are at least 16mm long to attach the knob to the central shutter column. Use M3 socket head bolts that are at least 12mm long to attach the lid and base of the traffic light model.
- If adding lights, make sure to pick electronics that will not generate excessive heat and pick an appropriate filament material for that heat. Using a metal armature to hold these parts is recommended.