Summary
Build and Test Linkage Mechanisms!
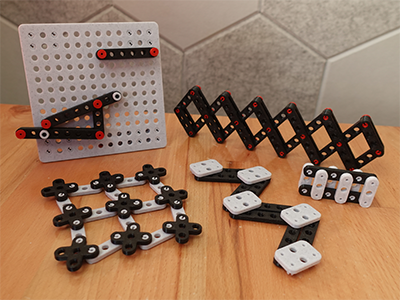
Parts
- Links The primary component of a linkage
- Pins Use these to connect links
- Base Useful for laying out stationary points in a linkage
- Plates Connect multiple bases together or elevate sections of a linkage
- Spacers Add vertical space between linkages
- Bolt cap Cap for an M2 socket head bolt
Custom Parts
Use the included STEP and Fusion360 template files to create your own custom parts and link lengths!
Printing
- Before committing to a long print with lots tiny parts, print only a couple test links and pins to make sure you get a good fit.
- Print all the links with at least 3 perimeters, so the outer wall and the inner wall of each hole merge into a single stronger frame.
- Print all links, bases, and plates at 100% scale. If the parts don’t quite fit, resize just the pins to fit everything else.
- For a smoother pin wall, manually place your print seam on the inner pin wall. If you have any adhesion issues, add a brim.
- Don’t rush the print speed.
- Look out for elephant's foot. Any extra squish on the bottom of a link will stop parts from fitting.
Assembly
This part is up to you!